Multimeters are suitable for many purposes. But usually, they only measure one value at a time. If we deal with power measurements, we need two multimeters, one for voltage and the second for Ampere. And if we want to measure efficiency, we need four multimeters. Here we will build small and inexpensive meters to do these measurements.
You can watch my video about building it if you want:
Step 1: Bill of Material
Such a meter is a simple build. It consists of these parts:
– 1x Meter
– 1 x 3D printed case
– 5 x Banana plugs
– 1 x 9V battery incl. connector
– 1 x switch
– 4 x 3mm screws
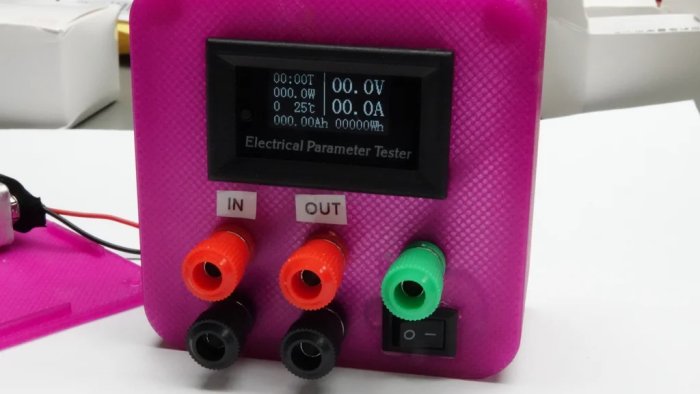
Step 2: The Meter
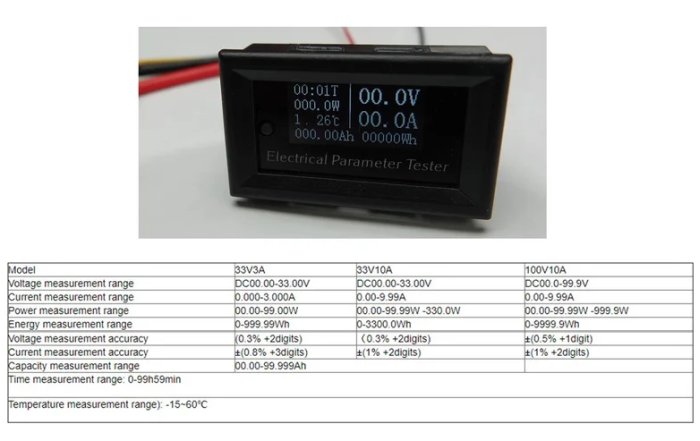
We get them in three versions: For 33 volts and 3 or 10 amperes and for 100 volts and 10 amperes. For small projects, I recommend the smallest version. Because it shows two decimal digits instead of one. The prices for all three versions seem to be the same.
The accuracy of the smallest version is sufficient for most normal hobby measurements. It will not be enough for very low voltages and small currents like deep-sleep measurements. But most Multimeters are also not very good at measuring low currents.
Step 3: The Box
First, you have to download
the STL files and from Thingiverse:
https://www.thingiverse.com/thing:2789890
and print the box on your 3d printer. If you do not have a 3D printer, you can use any other case. You find them cheaply on Bangood or Aliexpress. My boxes measure 8 x 8 cm and are 4 cm high.
Just print them with your 3D printer. If you plan different versions, maybe you select the color accordingly.
Next, you have to connect banana plugs to the cables of the meters.
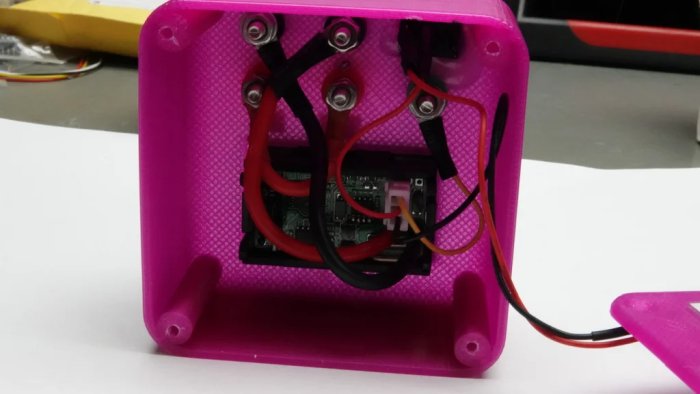
Step 4: Connect the Wires
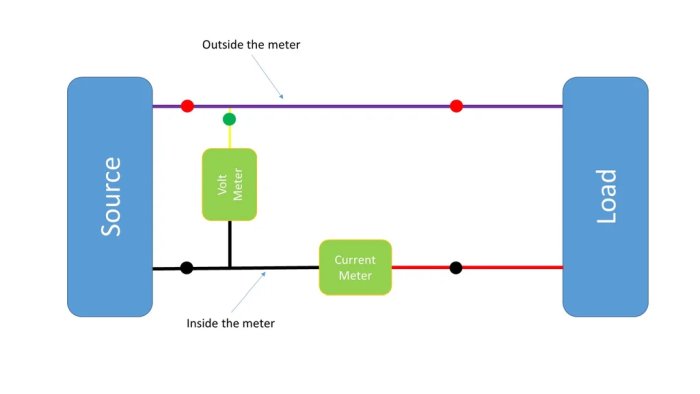
We use Banana Plugs as connectors and connect one black plug to the thick black wire and one to the thick red one. The two red plugs have to be connected internally.
The yellow wire is connected to the green plug.
The thin black and white wires have to be connected to a 9-volt battery connector. Insert a switch into the red wire to switch the device off if you do not need it. The battery will last around 50 hours.
For more details: Versatile Volt, Ampere, and Power Meter using Arduino