You have seen Propellers in Aircrafts or in marine ships, if not in real then in movies for sure. In this session we are going to design a Propeller Display with Arduino, LEDs and a DC motor. In this Propeller Display, text will appear to be rotating in propeller fashion in a circular shape.
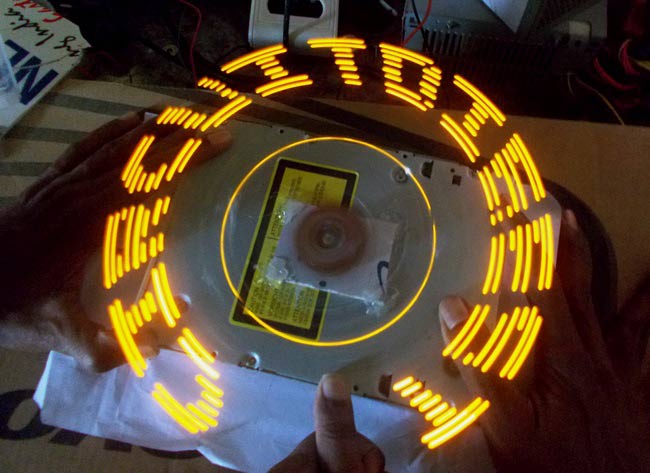
The propeller display is in a way like LED Matrix. It contains 8 LEDs (Light Emitting Diodes) which are arranged in the form of an 8*1 matrix (8 rows and 1 column). They are arranged in the form of ladder one over the other. These 8 LED can be made to display any content like text, numbers, symbols etc. This is achieved by Perception of Vision (POV), in which many still images are moved quickly one by one in a sequence, which gives a perception of animation or a moving image. How this is done is explained in the tutorial given below.
Components Required:
- Arduino Uno
- DC Motor
- +3.6V LI-ION battery
- LED (8 pieces)
- 1KΩ resistor (8 pieces)
Construction of Propeller Display:
First take a stable base; I used a old PC DVD DRIVE which was lying around. You can get a wooden plank or a cardboard box. Then make a hole in the middle of DVD Drive (base) and insert the DC motor axis in it. Make sure the hole is tight enough to hold the motor and motor can rotate freely. I used Feviquick to put the axis in place.
Support the top of Motor to equate the uneven bumps. I used a dot board over it and used quick glue again to stick it with DC motor.
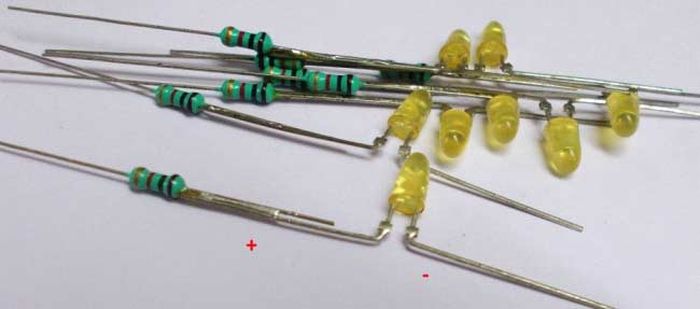
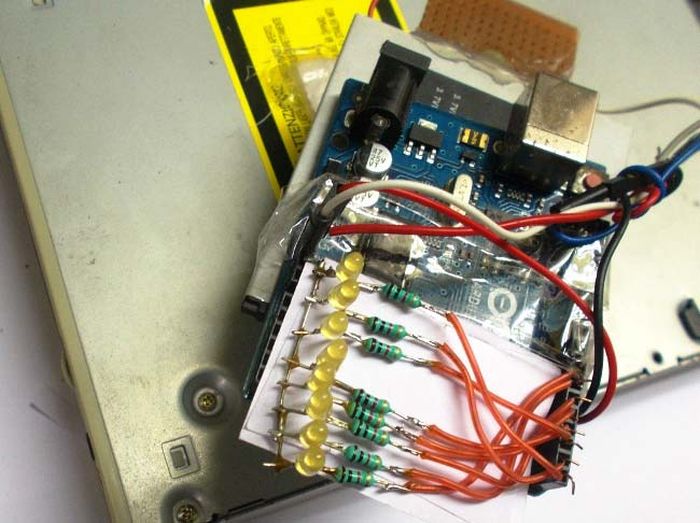
Attach the LI-ION battery on top. If you don’t have LI-ION battery of same size, just leave it. After that take each LED and test it with button cell or any other source. Then take some resistors and solder them with LEDs as per the picture and circuit diagram shown below.
Connect the soldered LEDs and resistors with Arduino UNO as shown in below figure and circuit diagram.
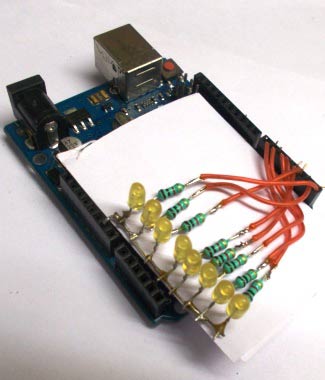
Mount the UNO on to the top of DC MOTOR and secure it with the help of cello tape to finish the setup. So the final Propeller setup will look like below:
Circuit and Working Explanation:
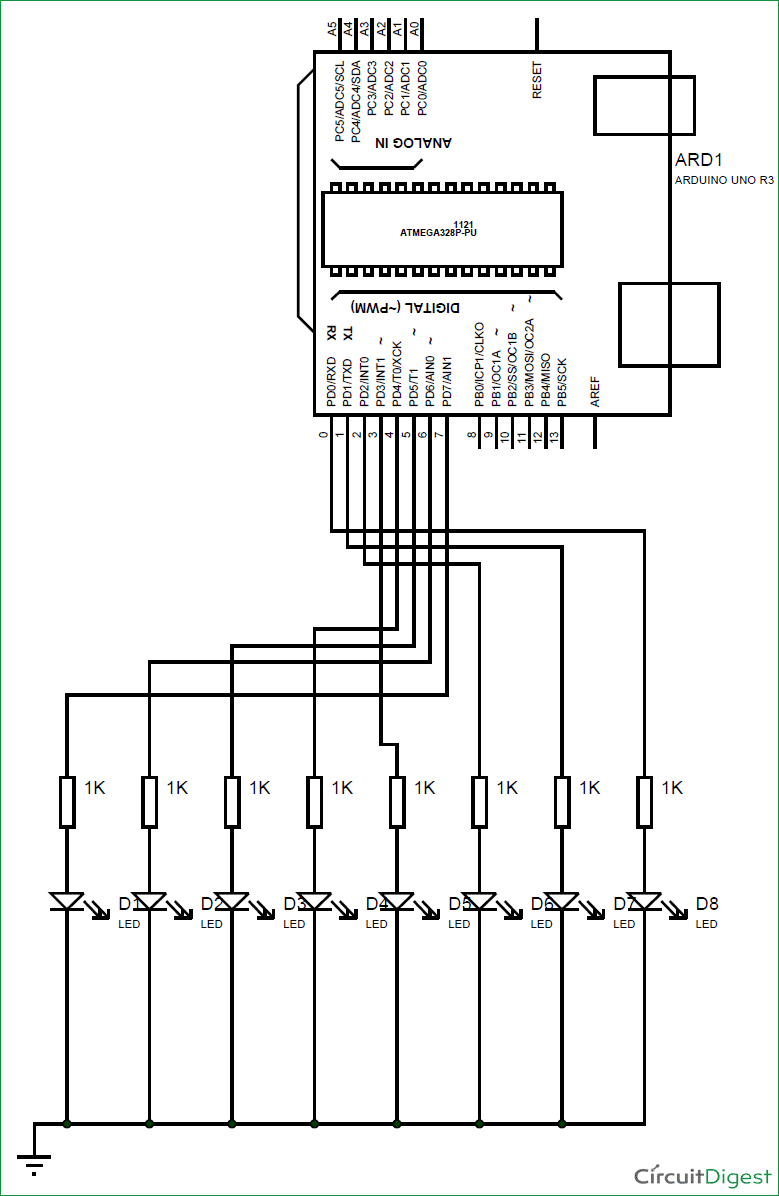
Circuit of Arduino controlled POV Display is very simple, we simply connected 8 LEDs with Arduino Uno as per circuit diagram below.
PORTD, PIN0 ——————LED8 POSITIVE TERMINAL
PORTD, PIN1 —————— LED7 POSITIVE TERMINAL
PORTD, PIN2 —————— LED6 POSITIVE TERMINAL
PORTD, PIN3 —————— LED5 POSITIVE TERMINAL
PORTD, PIN4 —————— LED4 POSITIVE TERMINAL
PORTD, PIN5 —————— LED3POSITIVE TERMINAL
PORTD, PIN6 —————— LED2 POSITIVE TERMINAL
PORTD, PIN7 —————— LED1POSITIVE TERMINAL
Like we add more columns in 8×8 LED Matrix to extend the display, in the same way instead of adding more LED COLUMNS we move the first LED COLUMN to the second LED COLUMN place by using the motion of DC MOTOR.
In order to understand the whole situation, say we want ‘A’ to be displayed by the propeller display. Consider the LED ‘needle’ is at POSITION1 at first as shown in figure below. LED Needle is the Column of 8 LEDs.
For More Details: Arduino Propeller LED Display